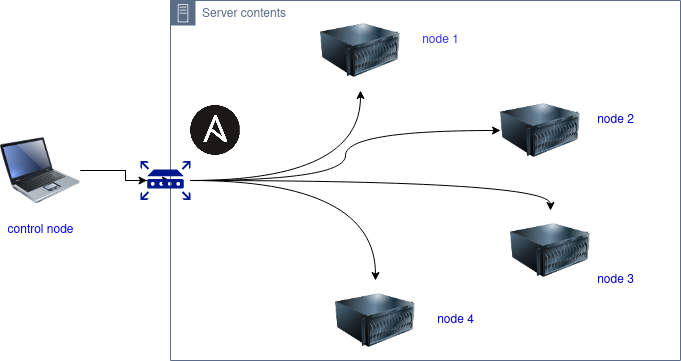
ကျွန်တော် ဒီနေ့ sharing လုပ်ချင်တာက Ansible Automation Lab ကို KVM ( Kernel Based Virtual Machine ) ပေါ်မှာ ဘယ်လို Implement လုပ်ရမလဲကို Sharing လုပ်ချင်ပါတယ်.
VirtualBox, VMWare Workstation ပေါ်မှာလဲ Implement လုပ်လို့ရပါတယ်. Procedures က အတူတူဘဲ.
Ansible Automation Lab အနိမ့်ဆုံး Hardware Requirements က
- Control node အတွက် RAM 1GB & HDD 40GB
- Managed node အတွက် RAM 512MB & HDD 20GB
ကျွန်တော်က Linux VM အတွက် RHEL 8 ( Ootpa ) ကိုသုံးထားပါတယ်.
Lab အတွက်
Control Node = 1 VM
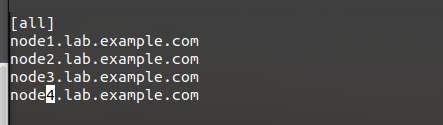
Managed Node = 4 VM ( 2VM or 1VM up to you )
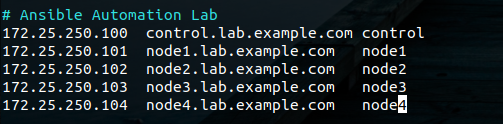
vim /etc/hostsအရင်ဆုံး ကျွန်တော်တို့ Host VM ရဲ့ /etc/hosts file မှာ FQDN နဲ့ IP ကို မှတ်ပေးပါ,
ကျွန်တော်တို့ အရင်ဆုံး Control Node မှာ Local Repo Create လုပ်ပါမယ်.
Prerequisites
- Red Hat Developer Subscription
- RHEL 8 DVD ISO
redhat developer account တစ်ခုကို အောက်ပါ link မှာ create လုပ်ပါ.
https://developers.redhat.com/
Red Hat 8 ISO ကို အောက်ပါ link မှာ down ပါ.
https://developers.redhat.com/products/rhel/download
ကျွန်တော်တို့ control node vm မှာ RHEL Developer Subscription ကိုအရင် register လုပ်ရပါမယ်.
 subscription-manager register
 subscription-manager attach --auto
 subscription-manager repos --enable ansible-2.8-for-rhel-8-x86_64-rpms
 yum repolist -v
 yum update
ansible ကို control node မှာ install လုပ်ပါ.
 yum install ansible
 ansible --version
တကယ်လို့ yum နဲ့ သွင်းရတာ အဆင်မပြေရင် pip နဲ့လဲ install လုပ်လို့ရပါတယ်.
pip install ansible==2.8.0control node
အရင်ဆုံ control node မှာ apache server ကိုသုံးပြီး local repo create လုပ်ပါမယ်
yum repolist & yum update -y
yum install httpd
mkdir /tmp/repo
mount -t iso9660 /dev/sr0 /tmp/repo
mkdir -p /var/www/html/repo
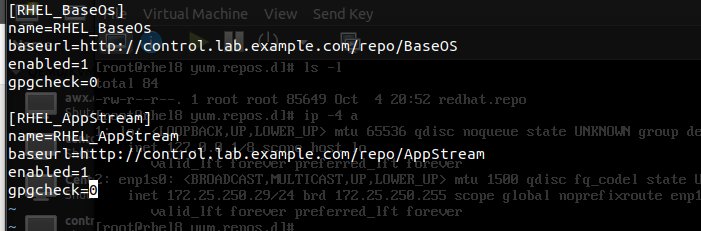
cp -avr /tmp/repo/* /var/www/html/repo/etc/yum.repos.d/ မှာ local.repo file ကို create လုပ်ပါ
 rm -rf /etc/httpd/conf.d/welcome.conf
 vi /etc/httpd/conf/httpd.conf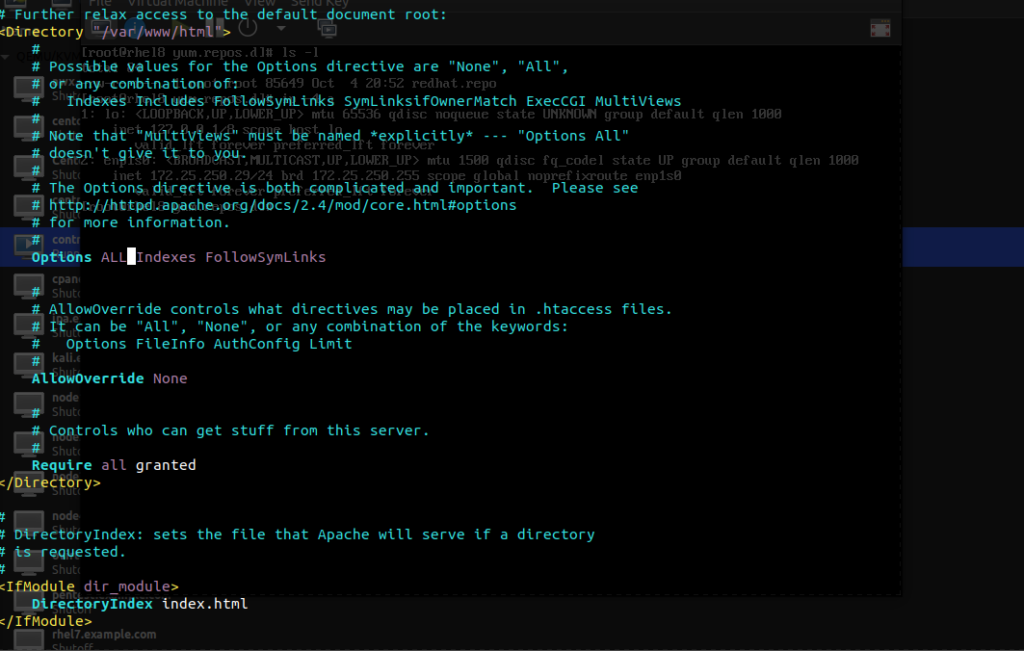
options ရဲ့နောက်မှာ ALL ကိုဖြည့်ပါ.
 systemctl restart httpd.service
 yum repolist -v
တကယ်လို့ RHEL Developer Subscription ကို မလိုတော့ရင်
 subscription-manager unregister
 yum repolist -v
managed nodes
managed node vm တွေအတွက် local.repo file ကို scp သုံးပြီး copy ကူးပါ. root user ကိုသုံးပါ.
for i in node{1..4}; do scp /etc/yum.repos.d/local.repo root@$i.lab.example.com:/etc/yum.repos.d/; done
control node vm မှာ http port ဖွင့်ပေးရပါမယ်.
 firewall-cmd --permanent --add-service=http && firewall-cmd --reload
 firewall-cmd --list-all
managed node vm တွေမှာ local repo ကို test လုပ်ပါ.
yum clean all && yum repolist -vဒါဆိုရင် http local repo ကို create လုပ်တဲ့အပိုင်း ကပြီးပါပြီ.
preparing dedicated user and passwordless auth
ansible lab အတွက် ssh-keygen နဲ့ sudoers file ကို အရင် create လုပ်ရပါမယ် student user အတွက်ပါ.
dedicated user account ကို တည်ဆောက်ပါ. sudoers file ကို root user နဲ့ create လုပ်ပါ.
 useradd student
 passwd student
 usermod -aG sudo student
 echo "student ALL=(ALL) NOPASSWD: ALL" > /etc/sudoers.d/student
 su - student
 ssh-keygen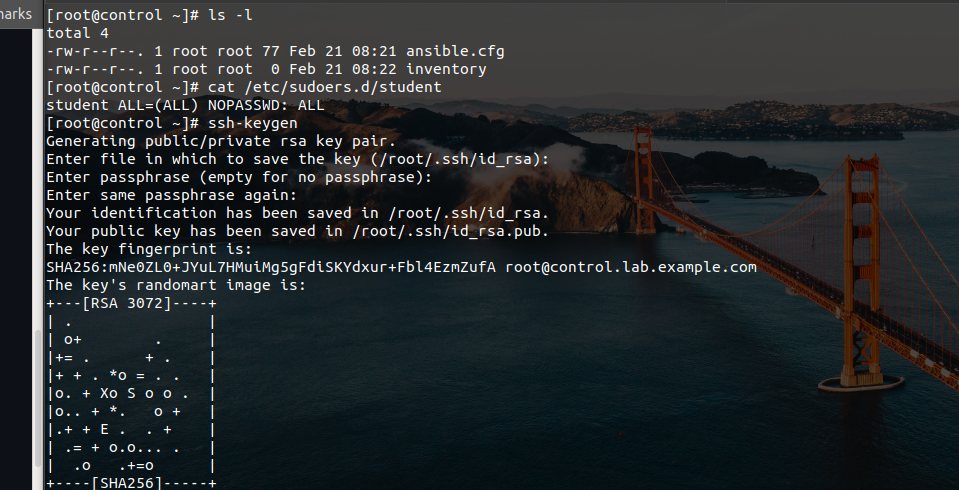

control node က sudoer file ကို managed hosts စီ copy လုပ်ပါ. root user ကိုသုံးပါ.
for i in node{1..4}; do scp /etc/sudoers.d/student root@$i.lab.example.com:/etc/sudoers.d/ ; donepasswordless authentication အတွက် ssh key-pair ကို copy လုပ်ပါ. student user ကို သုံးပါ.
for i in node{1..4}; do ssh-copy-id student@$i.lab.example.com; doneansible config file & inventory file ကို control node မှာ create လုပ်ရပါမယ်.
 mkdir ansible_lab
 vim ansible.cfg
  vim inventory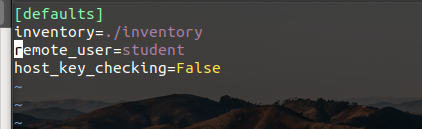
ansible ad-hoc and playbook ကို localhost မှာ အရင် test လုပ်ကြည့်ပါ.
 ansible localhost -m ping -c local
 ansible-playbook main.yml -c local -i "localhost,"
ansible ad-hoc and playbook ကို managed hosts တွေမှာ အရင် test လုပ်ကြည့်ပါ.
ansible all -m ping
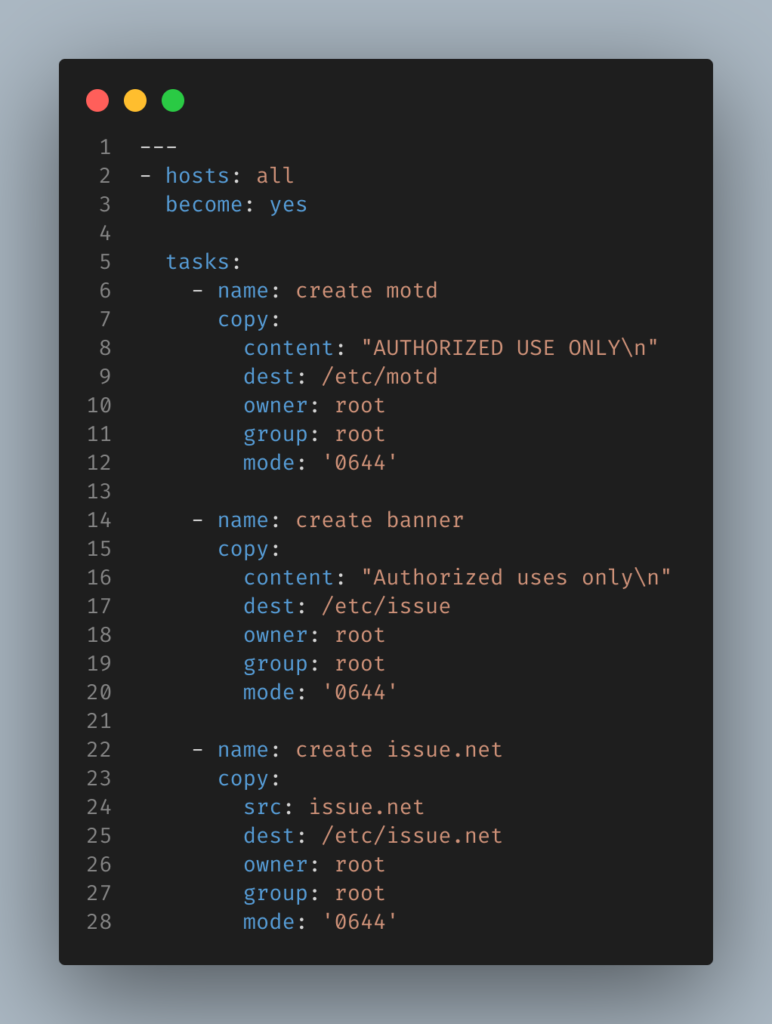
ansible-playbook main.yml Example Ansible Playbook
ansible ကို ဆက်လေ့လာလိုလျှင်.
https://www.ansiblefordevops.com/
https://www.jeffgeerling.com/blog/2020/ansible-101-jeff-geerling-youtube-streaming-series